
🔄 Backups & Snapshots
Regelmäßige Backups sind essenziell. Proxmox bietet integrierte Backup- und Snapshot-Funktionen für VMs und Container – manuell oder automatisch nach Zeitplan.
1. Backup vs. Snapshot
Was ist der Unterschied?
- Snapshot — Momentaufnahme des aktuellen Zustands (inkl. RAM optional). Schnell erstellt, aber auf dem gleichen Storage gespeichert. Ideal vor Updates.
- Backup — Vollständige Kopie auf einem separaten Storage (NAS, externe Disk). Schutz vor Hardware-Ausfall.
💡 Snapshots ersetzen kein Backup! Sie schützen nicht vor Festplattenausfall.
2. Backup-Modi
Drei Backup-Modi in Proxmox
- Stop — VM/CT wird gestoppt, Backup erstellt, danach wieder gestartet. Konsistentestes Backup ✅
- Suspend — VM wird suspendiert (RAM eingefroren). Kürzere Downtime als Stop.
- Snapshot — Backup im laufenden Betrieb. Keine Downtime, aber ggf. nicht 100% konsistent.
- Mit QEMU Guest Agent: Filesystem-Freeze für Konsistenz
3. Manuelles Backup
Über das Webinterface
- VM oder CT auswählen → Backup
- Backup now klicken
- Storage, Modus und Komprimierung wählen
- Backup starten
Per CLI
# VM Backup (ID 100)
vzdump 100 --storage local --mode snapshot --compress zstd

# Container Backup (ID 200)
vzdump 200 --storage local --mode stop --compress zstd

# Mehrere VMs/CTs
vzdump 100 200 300 --storage backup-nas --mode snapshot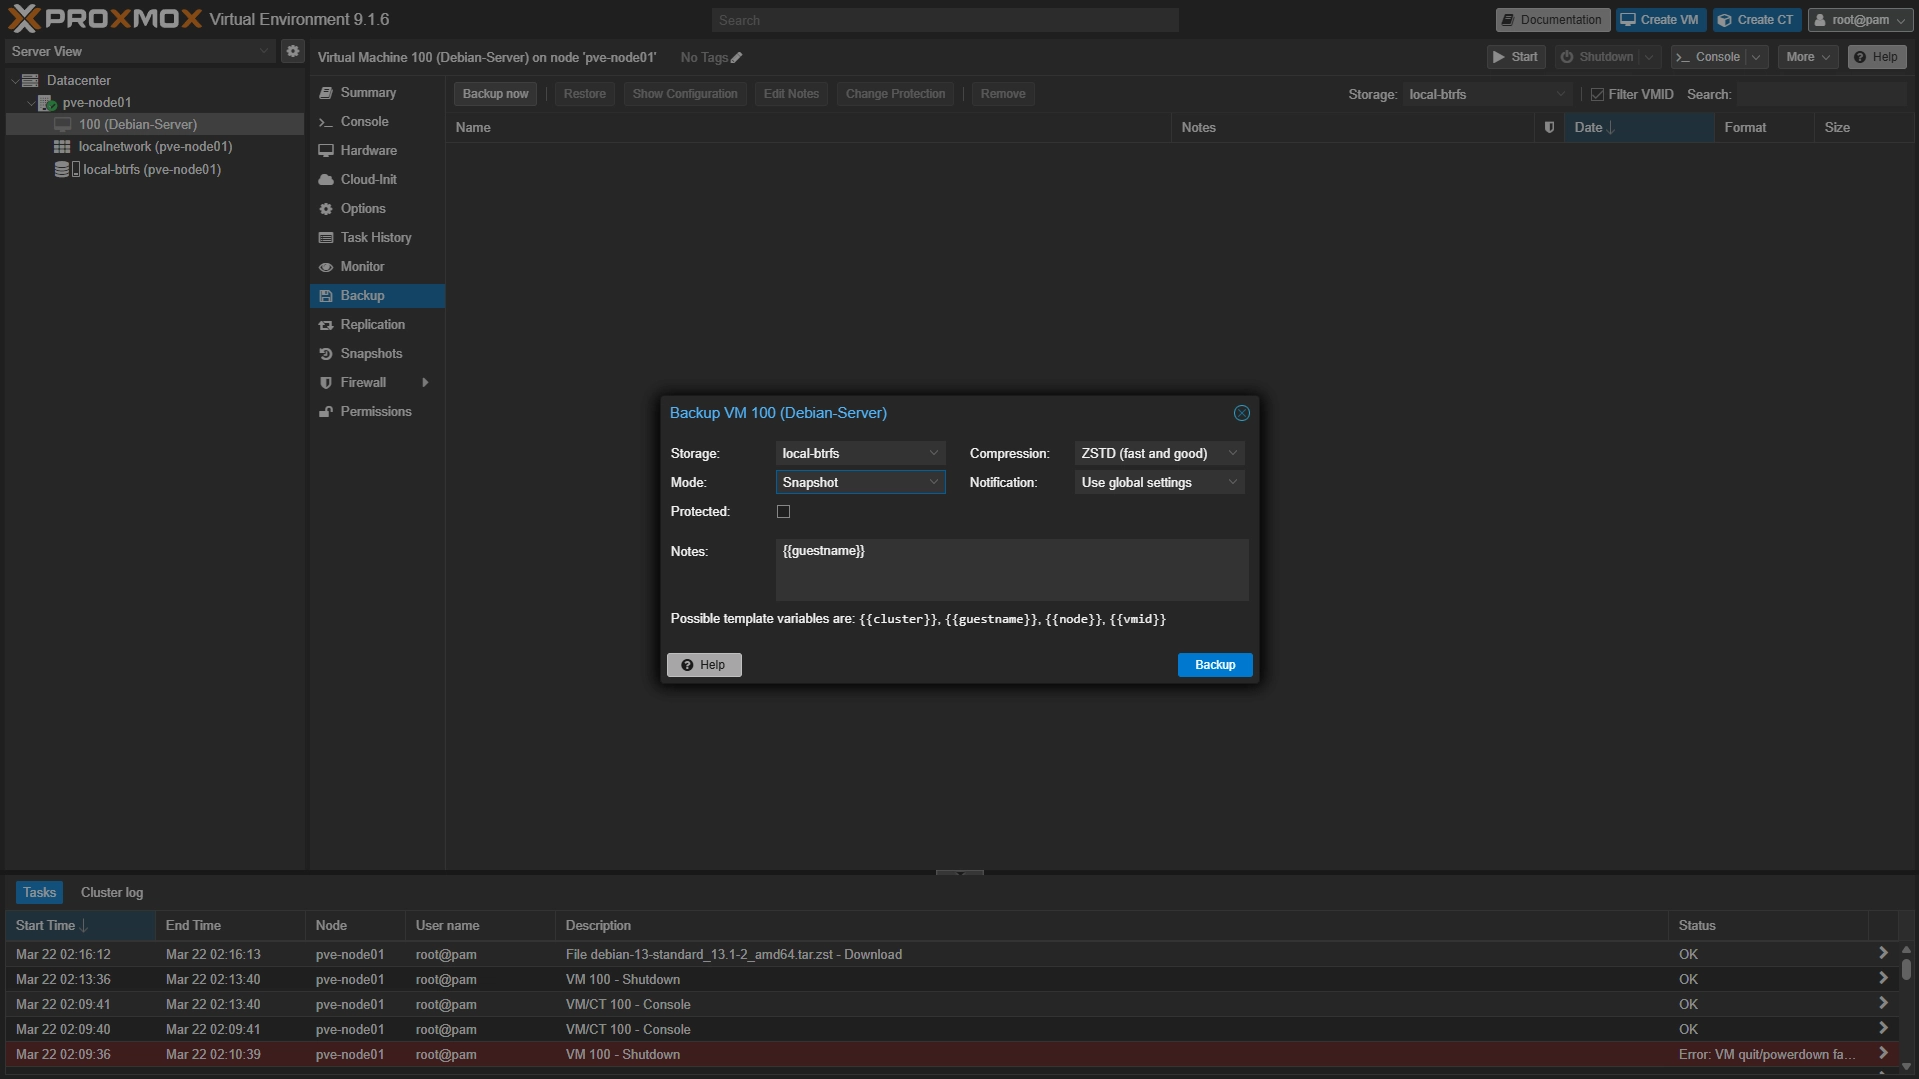
4. Automatische Backups (Zeitplan)
Backup-Job einrichten
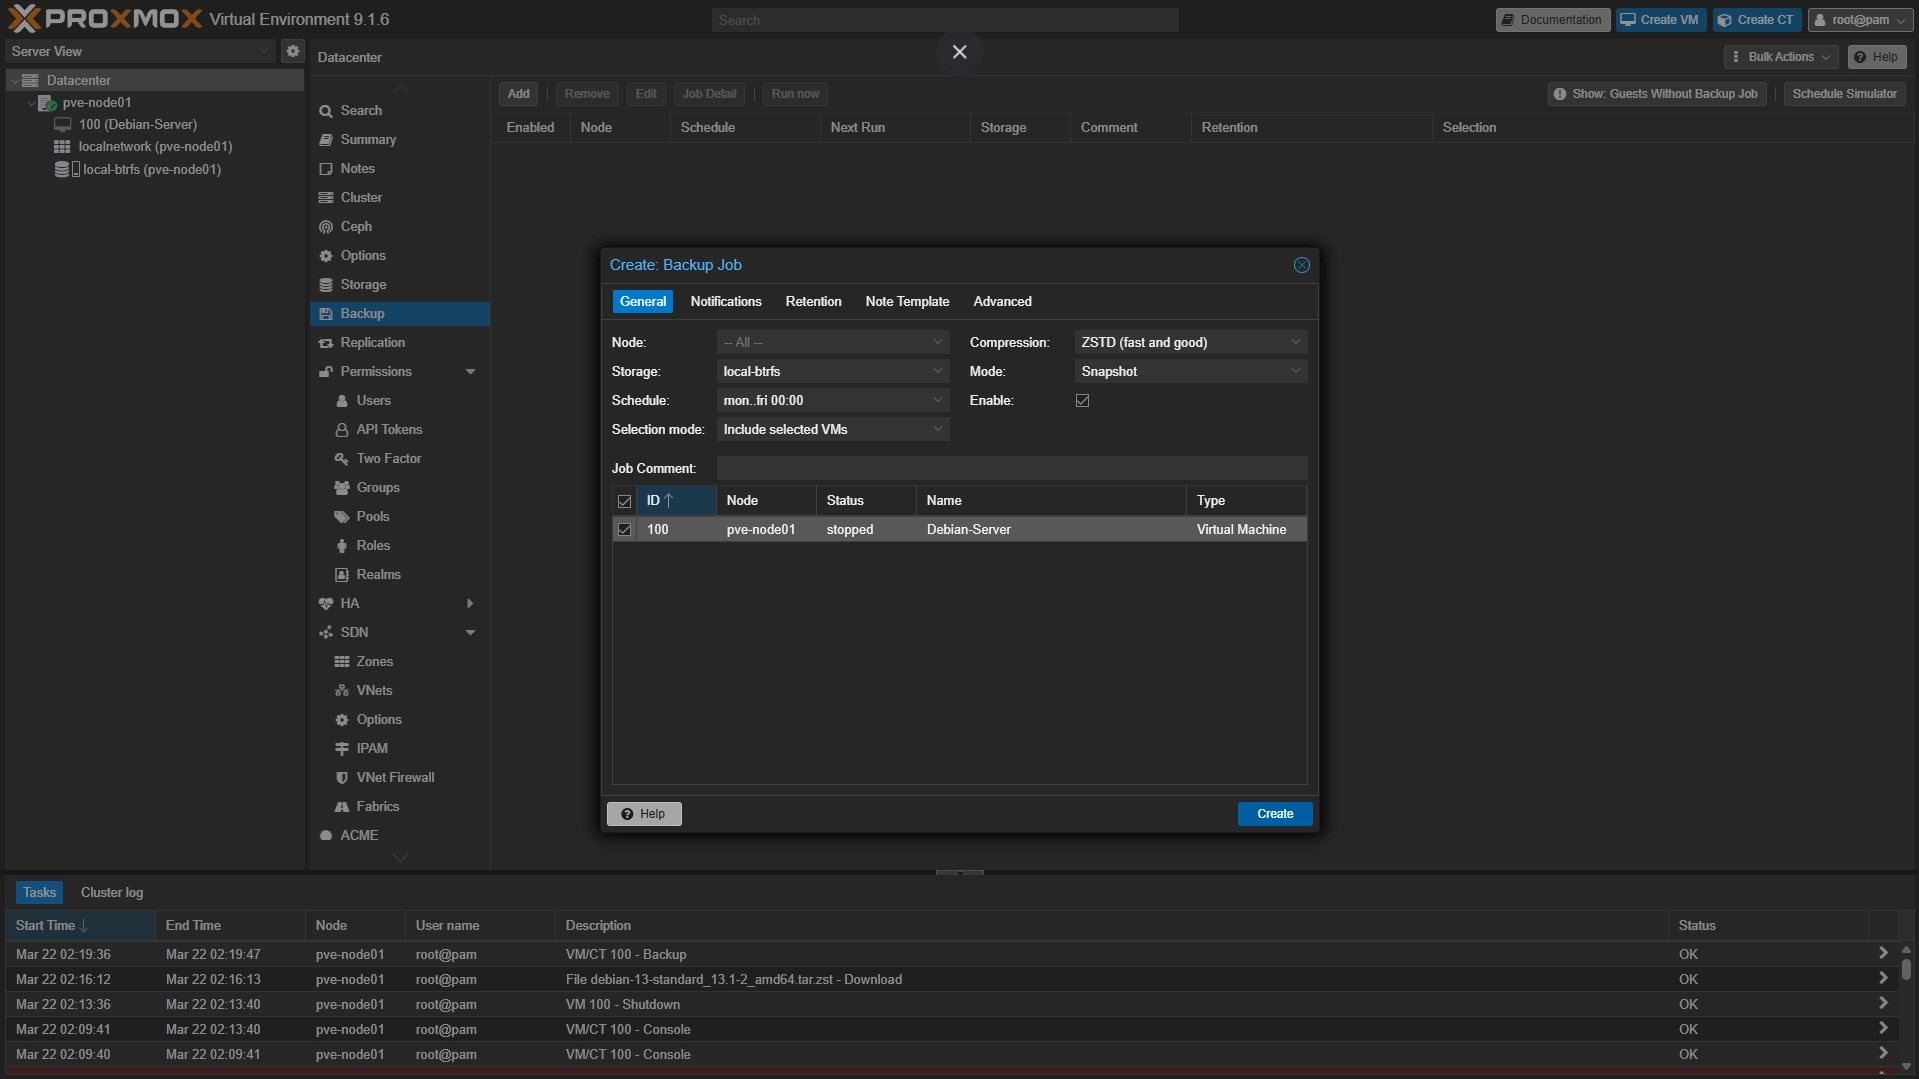
Im Webinterface: Datacenter → Backup → Add
- Storage: Ziel-Storage auswählen (z.B. NAS, separate Disk)
- Schedule: Zeitplan festlegen (z.B. täglich um 02:00)
- Selection: Alle VMs/CTs oder bestimmte auswählen
- Mode: Snapshot empfohlen (kein Downtime)
- Compression: ZSTD (schnell und effizient)
- Retention: Wie viele Backups behalten (z.B. letzte 7)
5. Backup-Storage einrichten
NAS als Backup-Ziel (NFS/SMB)
Im Webinterface: Datacenter → Storage → Add
- NFS: Server-IP + Export-Pfad angeben
- SMB/CIFS: Server, Share-Name, Username/Passwort
- Content: VZDump backup file auswählen
Oder per CLI (NFS):
pvesm add nfs backup-nas \
  --server 192.168.1.50 \
  --export /volume1/proxmox-backups \
  --content vzdump
6. Snapshots erstellen
VM Snapshots
# Snapshot erstellen
qm snapshot 100 pre-update --description "Vor dem Update"

# Snapshot-Liste anzeigen
qm listsnapshot 100

# Snapshot zurücksetzen (Rollback)
qm rollback 100 pre-update

# Snapshot löschen
qm delsnapshot 100 pre-update
Container Snapshots
pct snapshot 200 pre-update
pct listsnapshot 200
pct rollback 200 pre-update
pct delsnapshot 200 pre-update
7. Backup wiederherstellen (Restore)
Über das Webinterface
- Storage → Content → Backup-Datei auswählen
- Restore klicken
- Ziel-VM/CT-ID und Storage wählen
- Wiederherstellen starten
Per CLI
# VM wiederherstellen
qmrestore /var/lib/vz/dump/vzdump-qemu-100-*.vma.zst 100

# Container wiederherstellen
pct restore 200 /var/lib/vz/dump/vzdump-lxc-200-*.tar.zst
8. Best Practices
💡 Tipps
- 3-2-1 Regel: 3 Kopien, 2 Medien, 1 offsite
- Backups auf separatem Storage speichern (NAS, externe Disk)
- QEMU Agent installieren für konsistente Snapshots
- Retention Policy konfigurieren (alte Backups automatisch löschen)
- Restore regelmäßig testen! Ein Backup das nicht funktioniert ist kein Backup.
- ZSTD als Komprimierung: schnell und gute Ratio
✅ Backups eingerichtet!
Eure Daten sind jetzt geschützt. Denkt daran, den Restore regelmäßig zu testen – nur so wisst ihr sicher, dass eure Backups im Ernstfall funktionieren.